Online
Encrypted & ad-free
10 Gbps network
Convert any file hosting link into premium download links. Get maximum speed, no waiting times, and unlimited downloads from 50+ supported hosts.
Use the native macOS VPN client with Cisco IPsec and a shared secret.
Open Network Preferences… from the Wi-Fi/network menu.

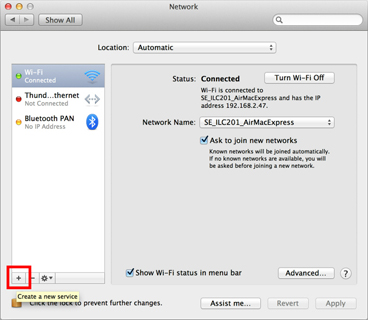
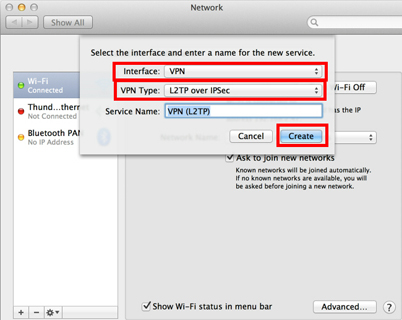
Click + → Interface: VPN → VPN Type: Cisco IPsec → Create.
Enter a server from /vpn (e.g. vpn-ams.cocoleech.com) as Server Address. Click Authentication Settings….


Enter your Cocoleech Username and Password. Set Shared Secret to vpn. Save with OK.
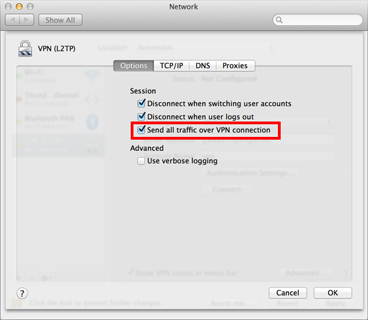
(Optional) Enable Show VPN status in menu bar. Click Advanced… and enable Send all traffic over VPN connection.
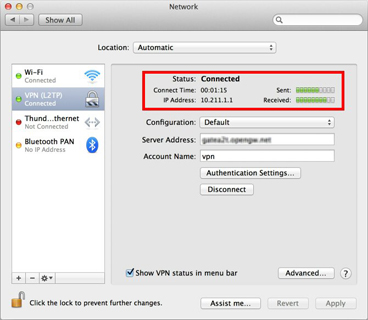
Click Apply then Connect. When connected, status shows Connected.
If it fails to connect: re-check server/credentials, confirm Type = Cisco IPsec and Shared Secret = vpn, and try another region from /vpn.